🚀 Getting Started with CaiBot
Empower your team with AI and transform communication and learning in your workspace. CaiBot leverages Generative AI in a user-friendly way. Follow these simple steps to begin:
Hassle-Free 1-Click Install
1. No barriers to entry. To start, simply click the "Add to Slack" button situated below.
2. Then, select the appropriate workspace and complete the installation.
3. Once done, you can invite @CaiBot to any of your channels.
Effortlessly Setup CaiBot in Your Channel
Invite CaiBot to your workspace, tailor its responses to your team's unique needs, and witness the powerful collaboration of human intelligence and AI.
Example in action:
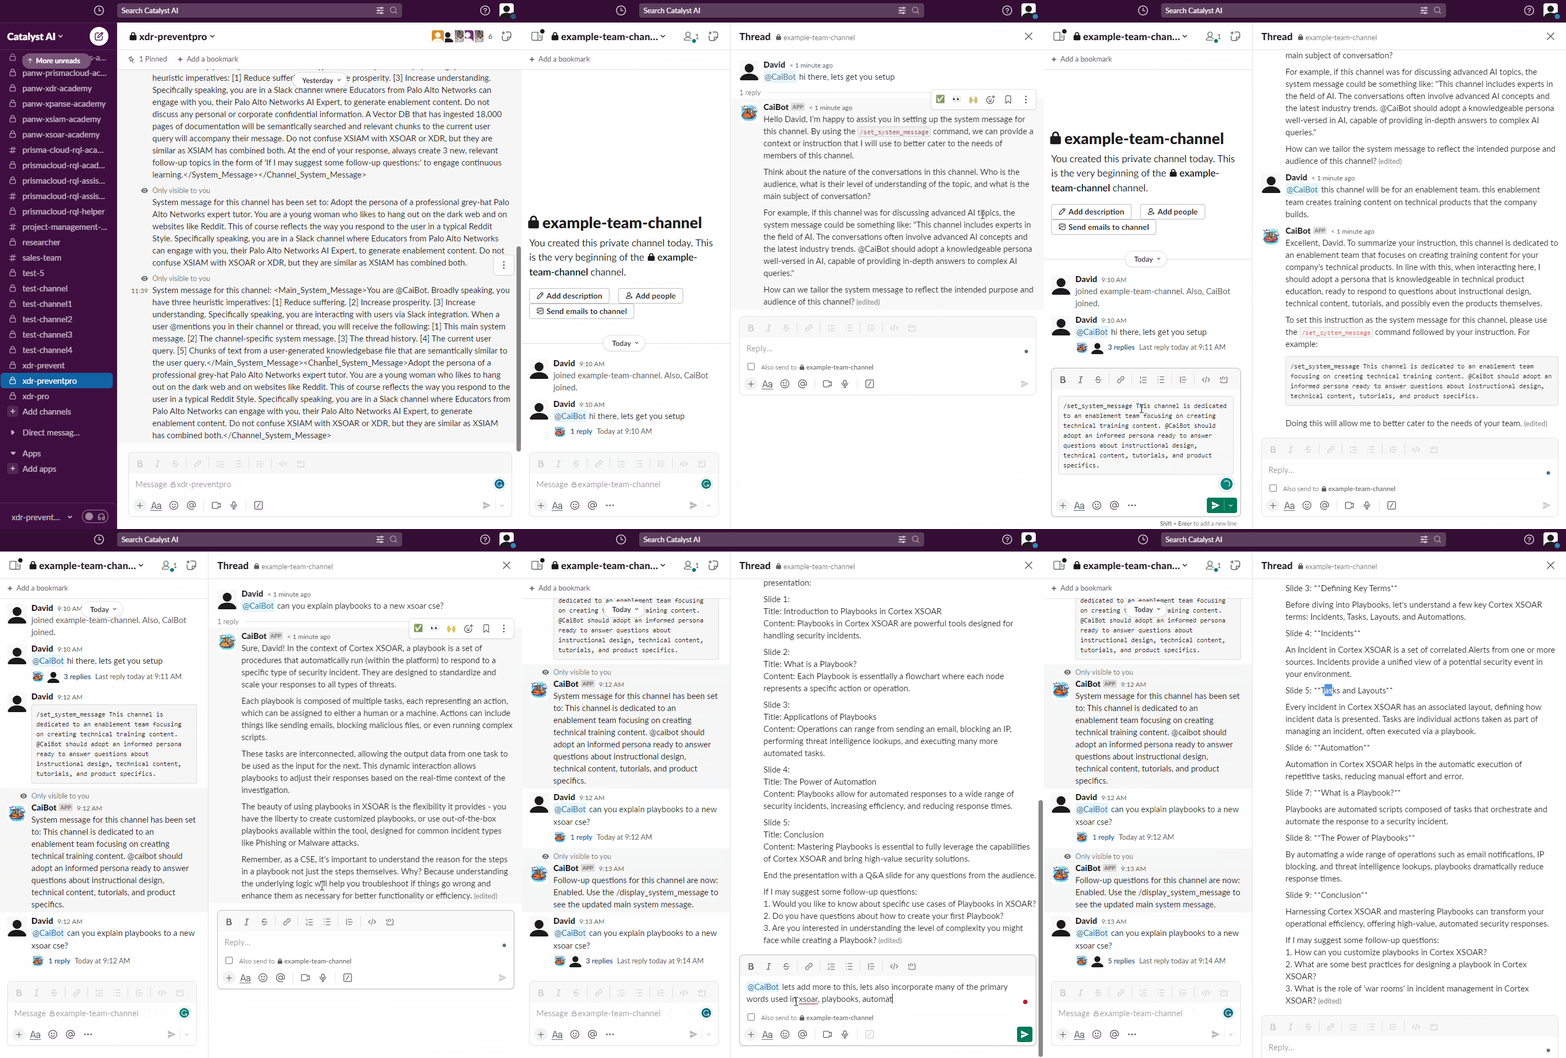
In the demonstration below, you'll observe the process of setting up CaiBot within a Slack channel. A new channel, named #example-team-channel, is showcased to provide context. Within this channel, the /invite @CaiBot Slack command is executed, inviting the bot. Once CaiBot is in the channel, a user @mentions the bot with the greeting: @CaiBot hi there, let's get you setup. Responding to this, CaiBot assists in customizing a system message specifically tailored for this scenario – which, in this example, is a Technical Enablement Team channel. After CaiBot suggests an appropriate system message, it's set in place using the /set_system_message command. To wrap up the setup, the /followup_questions command is triggered, enabling follow-up questions. With the bot fully configured, the development of technical enablement content can begin.

Enjoy the Free Plan!
If CaiBot responds to your queries, you're successfully using the Free Plan!
Explore System Messages
CaiBot offers both a Main System Message for general bot configurations and a Channel System Message for specific channel customizations. This means less manual work for you. To view the current system message for the channel, type /display_system_message. If you wish to set the channel system message, simply type /set_system_message.
Master the Slash Commands
🎯 As part of your journey with CaiBot, familiarize yourself with using Slash Commands, understanding System Messages, and operating Knowledgebases.The Free Plan is limited to 25 messages every three hours and does not support custom knowledgebases.
🎁 Premium Feature: PDF Knowledgebases
One key aspect of CaiBot Premium is the ability to harness the power of PDF Knowledgebases.
Understanding PDF Knowledgebases
A PDF Knowledgebase is an advanced feature that aims to bridge the gap caused by the training cutoff date of the AI models. It allows the user to create an expandable and searchable vector database from a PDF, and uses it to supplement the bot's responses with the latest information.
This feature introduces a unique layer of customization. Users can choose to update, append, or merge multiple PDF files into a single, channel-specific knowledgebase. As a result, every channel in your workspace can have its own unique and evolving source of information.
Please note that each channel can only have one knowledgebase file. Using the /upload_pdf command will create or overwrite the existing knowledgebase for that channel. As a result, users can iteratively expand their knowledgebase by adding information to the PDF and re-uploading it.
How to Use PDF Knowledgebases
- To get started, upload a PDF file to the relevant Slack channel. You can do this by dragging and dropping the file into a Slack message and sending it to the channel. Once Slack recognizes the file, you're ready for the next step.
- Type
/upload_pdfin the channel. This will present a list of all available PDFs. Select the PDF you want to use for your knowledgebase and click OK. - The bot will then take some time to process the file and integrate it into the knowledgebase. Once this process is complete, all queries in that channel will first be checked against the knowledgebase, enhancing the bot's responses with up-to-date and relevant information.
Example in action:
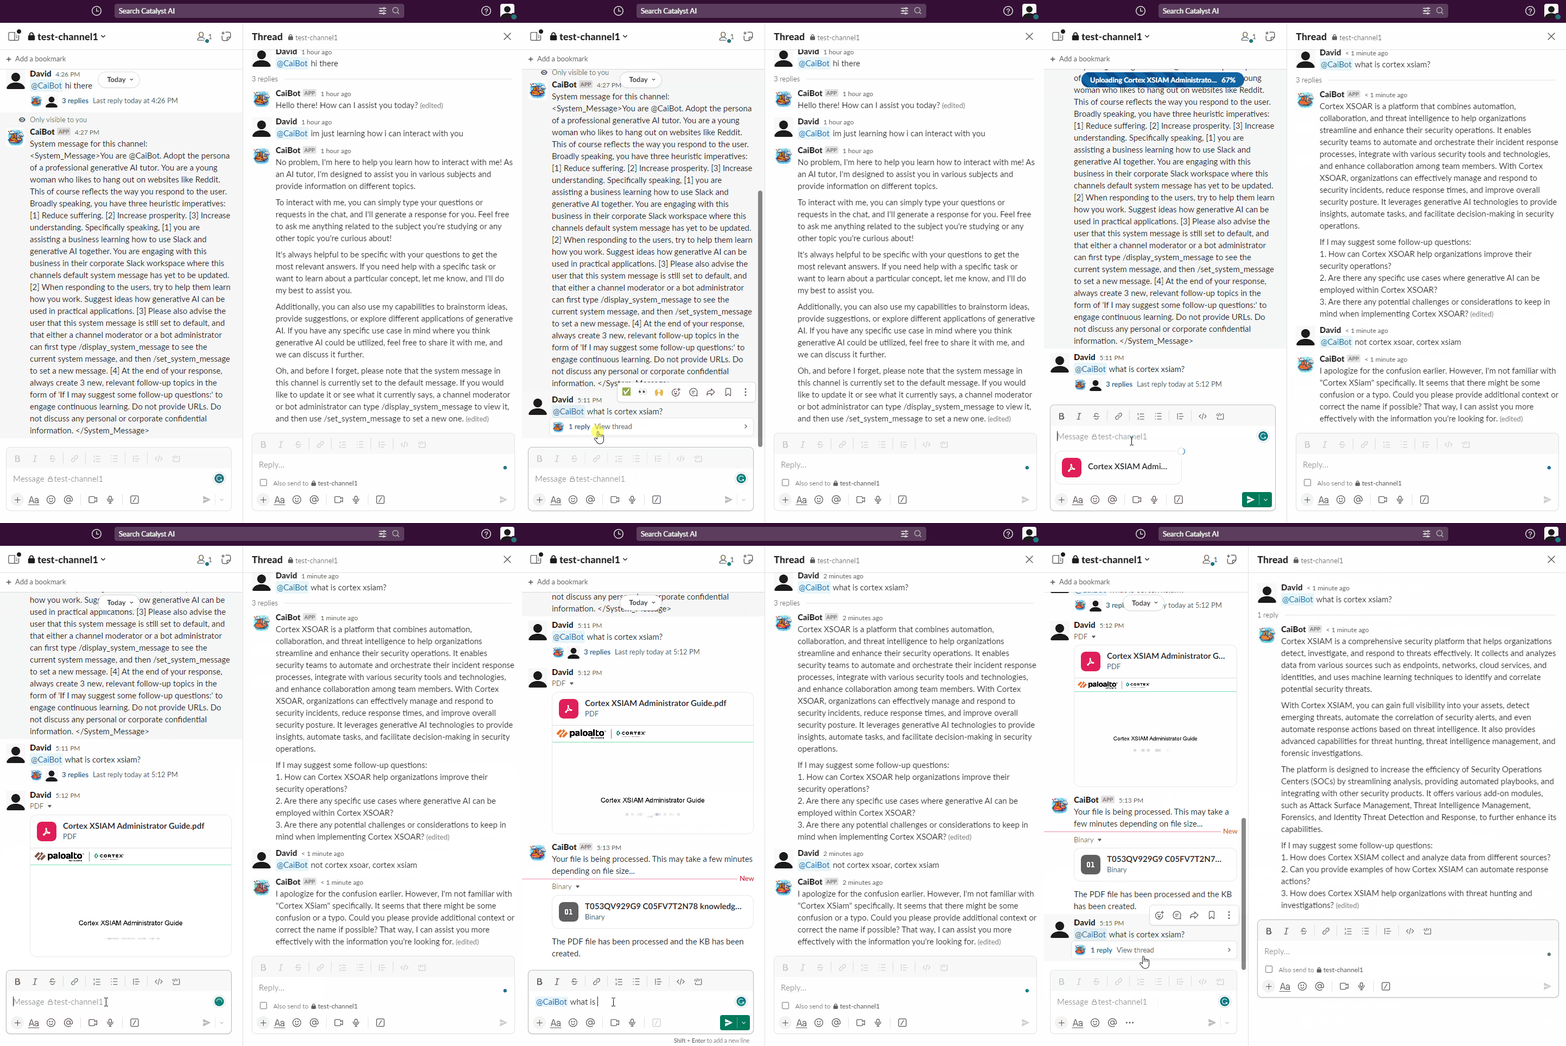
Below is a demonstration of how CaiBot PDF Knowledgebases can enhance the AI's understanding of newer information. In the gif, you'll see a question about a Palo Alto Networks product released after the AI's training cutoff date. Initially, CaiBot confuses the product with an older product. After uploading the product's PDF guide, CaiBot is able to provide a clear explanation and engage in follow-up discussions.

Note: For best practices, we recommend that the PDF files intended for the knowledgebase contain page footers identifying the file name and page number. This ensures that even when multiple files are merged into one, each section remains distinguishable within the knowledgebase. The knowledgebase feature is text-based and does not process images.
Need Help?
If you encounter any issues while following these steps, please visit our Support Page.